Smartphone Photography
Indoor Phone Photography: 8 Real-World Setups Compared
Better indoor photos usually come from improving light, distance and camera position rather than buying extra equipment. This guide compares eight common indoor situations so you can see what changes and what to fix first.
Quick answer
Start with light direction, then fix distance and exposure.
For a simple indoor portrait, use soft window light from slightly to one side, switch off unnecessary warm room lights, stand away from the background when possible, and use the phone's regular 1x camera rather than heavy digital zoom.
Those four changes solve many common indoor-photo problems before you need editing, extra lights or specialist camera apps.
Comparison
Which indoor setup works best?
| Setup | Result | Difficulty | Best use |
|---|---|---|---|
| Soft side window | Natural depth | Easy | Best overall starting point |
| Front window | Bright + even | Easy | Simple portraits |
| Mixed lighting | Uneven color | Hard | Creative use only |
| Overhead light | Strong downward shadows | Medium | Last resort |
| Close to wall | Flat background | Easy | Small rooms only |
| Away from wall | More separation | Easy | Cleaner portraits |
| Regular 1x camera | Natural detail | Easy | Most indoor photos |
| Low light | More noise + softer detail | Hard | Nighttime situations |
Eight setups
What changes in each situation
The visual examples keep the subject and styling intentionally similar. That makes it easier to compare changes in lighting, background distance and camera use without changing everything at once.
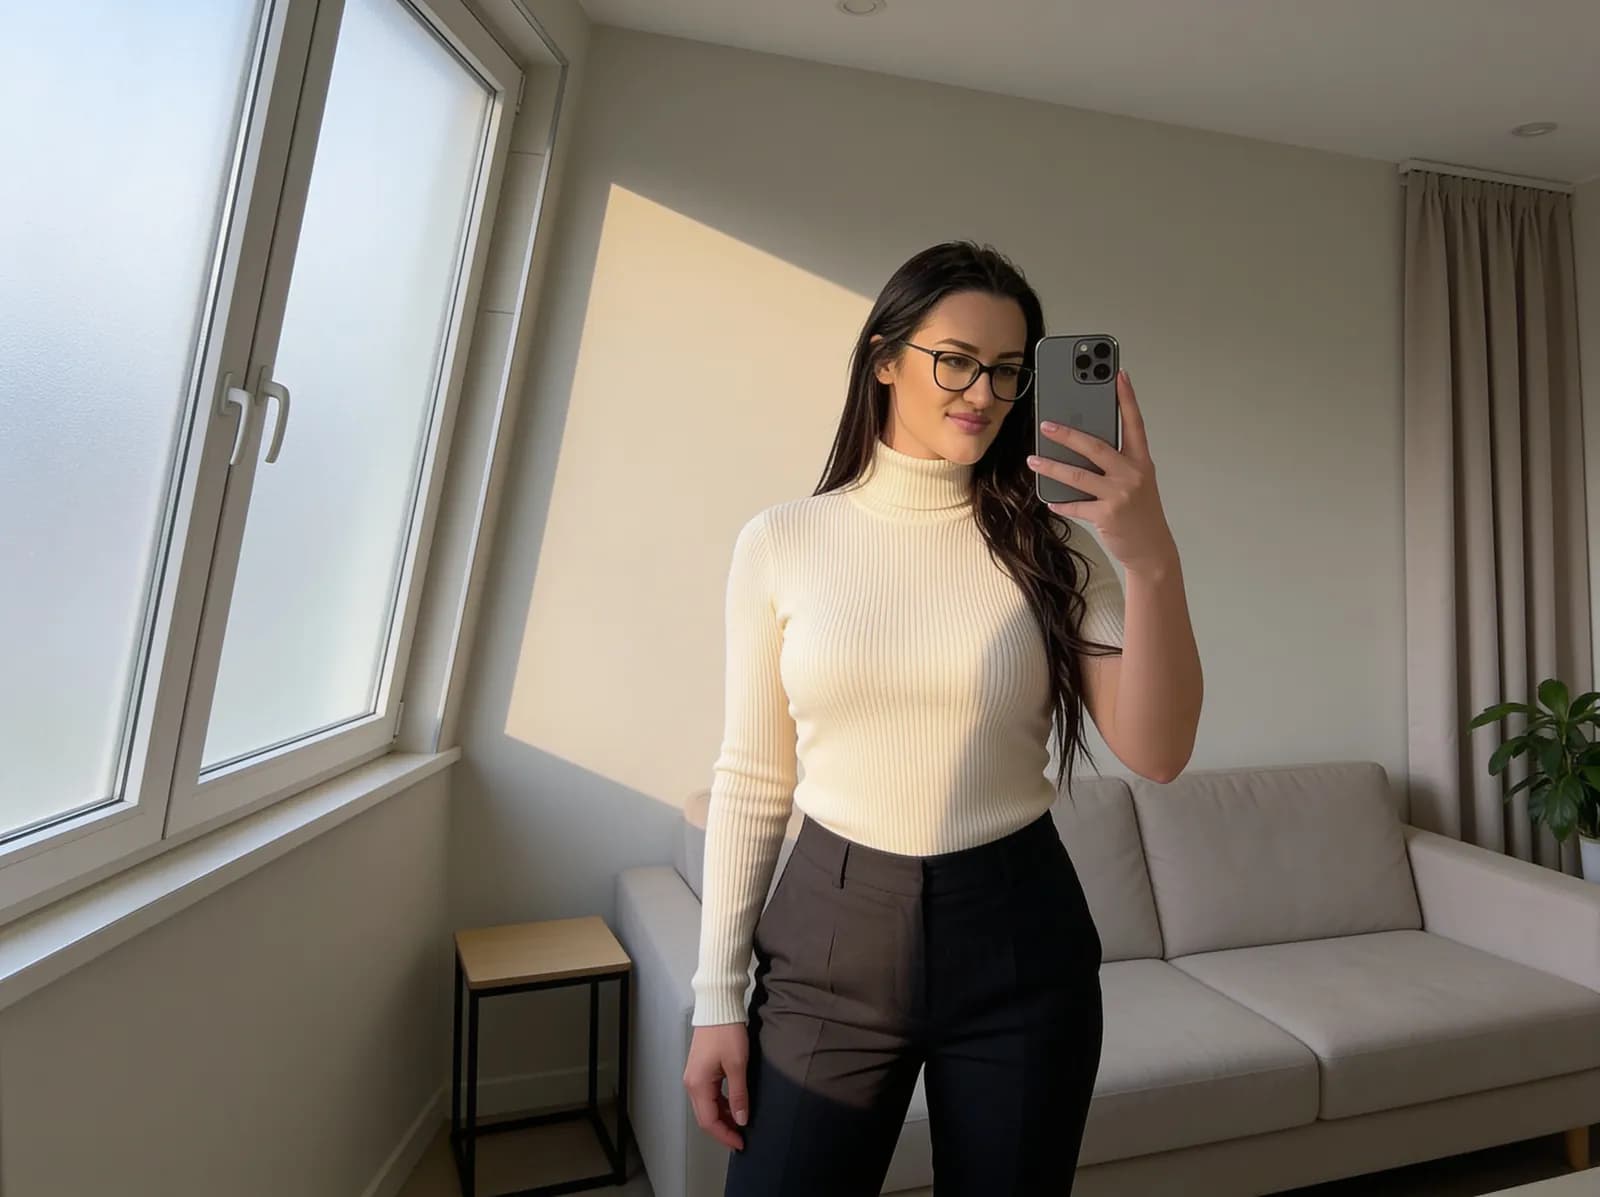
Soft side-window light
Soft daylight from one side gives the face and clothing shape while keeping shadows gentle and natural.
Best for
Everyday indoor portraits
Common problem
If the window is much brighter than the room, highlights can wash out while the shadow side becomes too dark.
Quick fix
Move slightly farther from the window or reduce exposure until bright areas retain detail.
Front window light
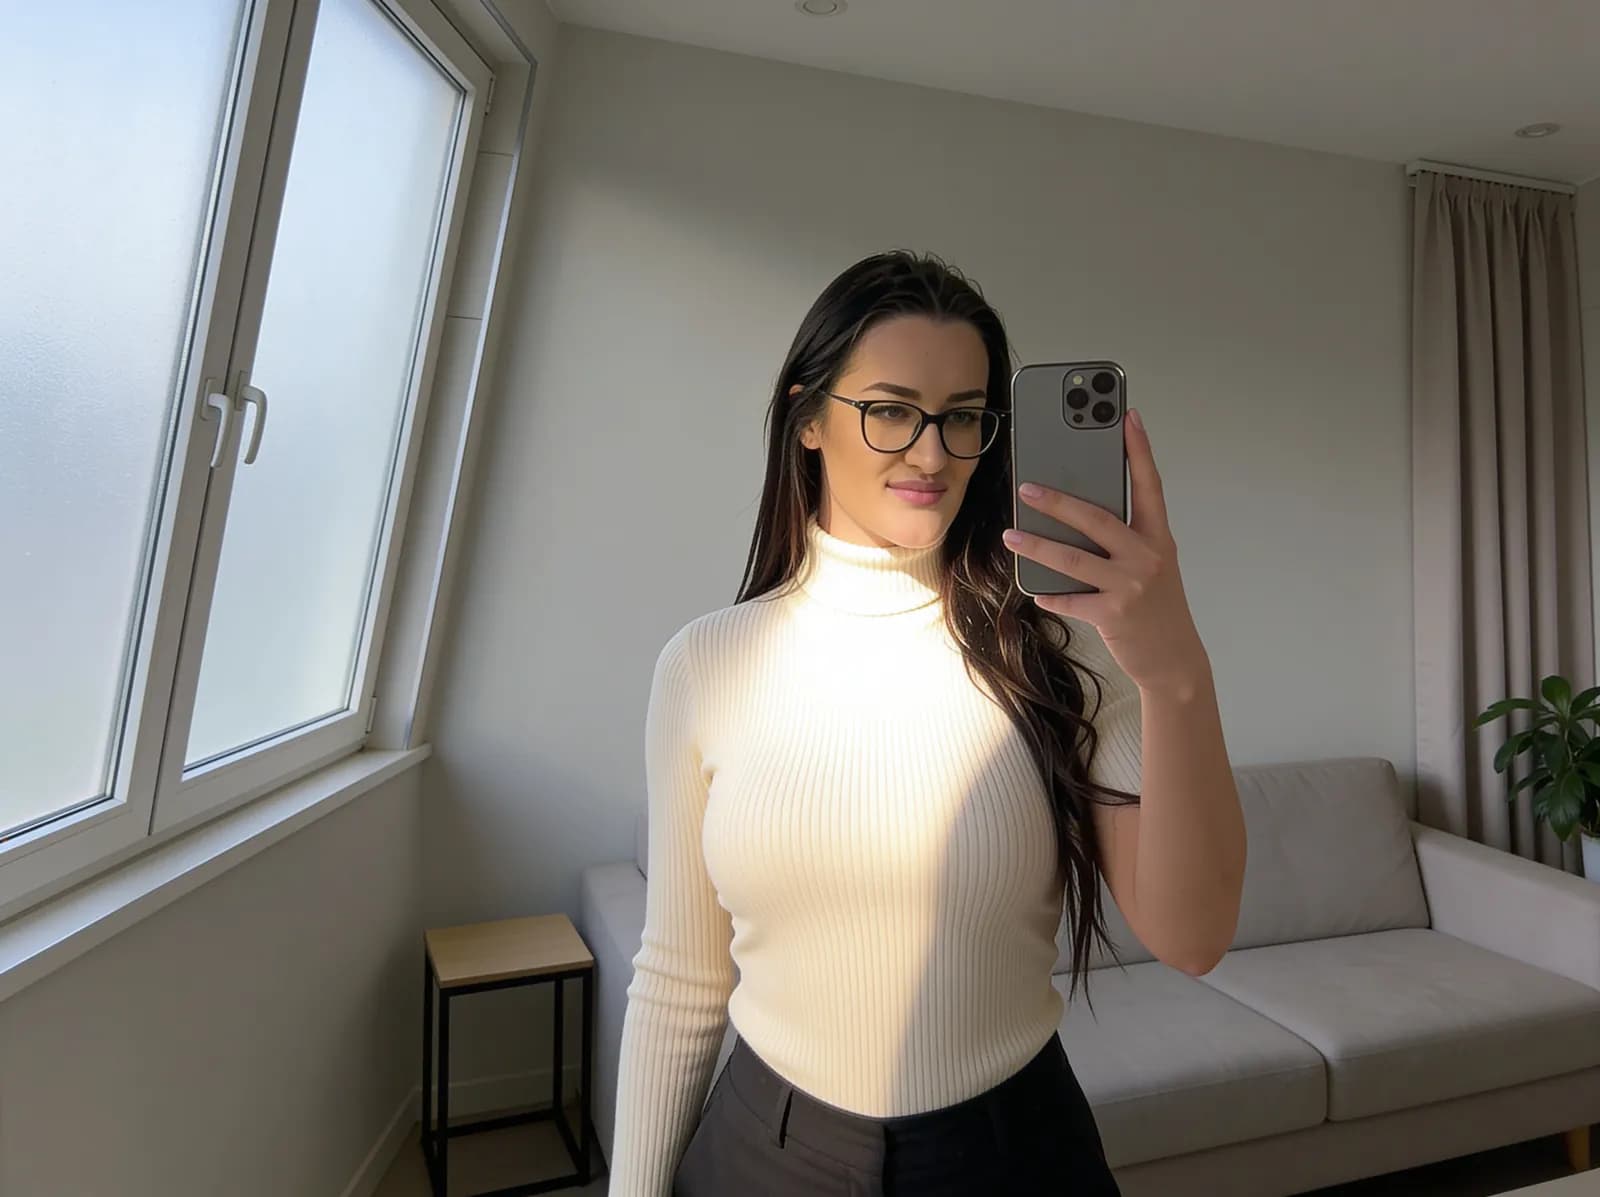
Front-facing window light reduces strong shadows and creates a cleaner, flatter look.
Best for
Simple portraits and outfit photos
Common problem
The image can feel flat because there is less shadow defining the face and clothing.
Quick fix
Turn the body slightly or move a little to one side to restore natural depth.
Mixed daylight and room light
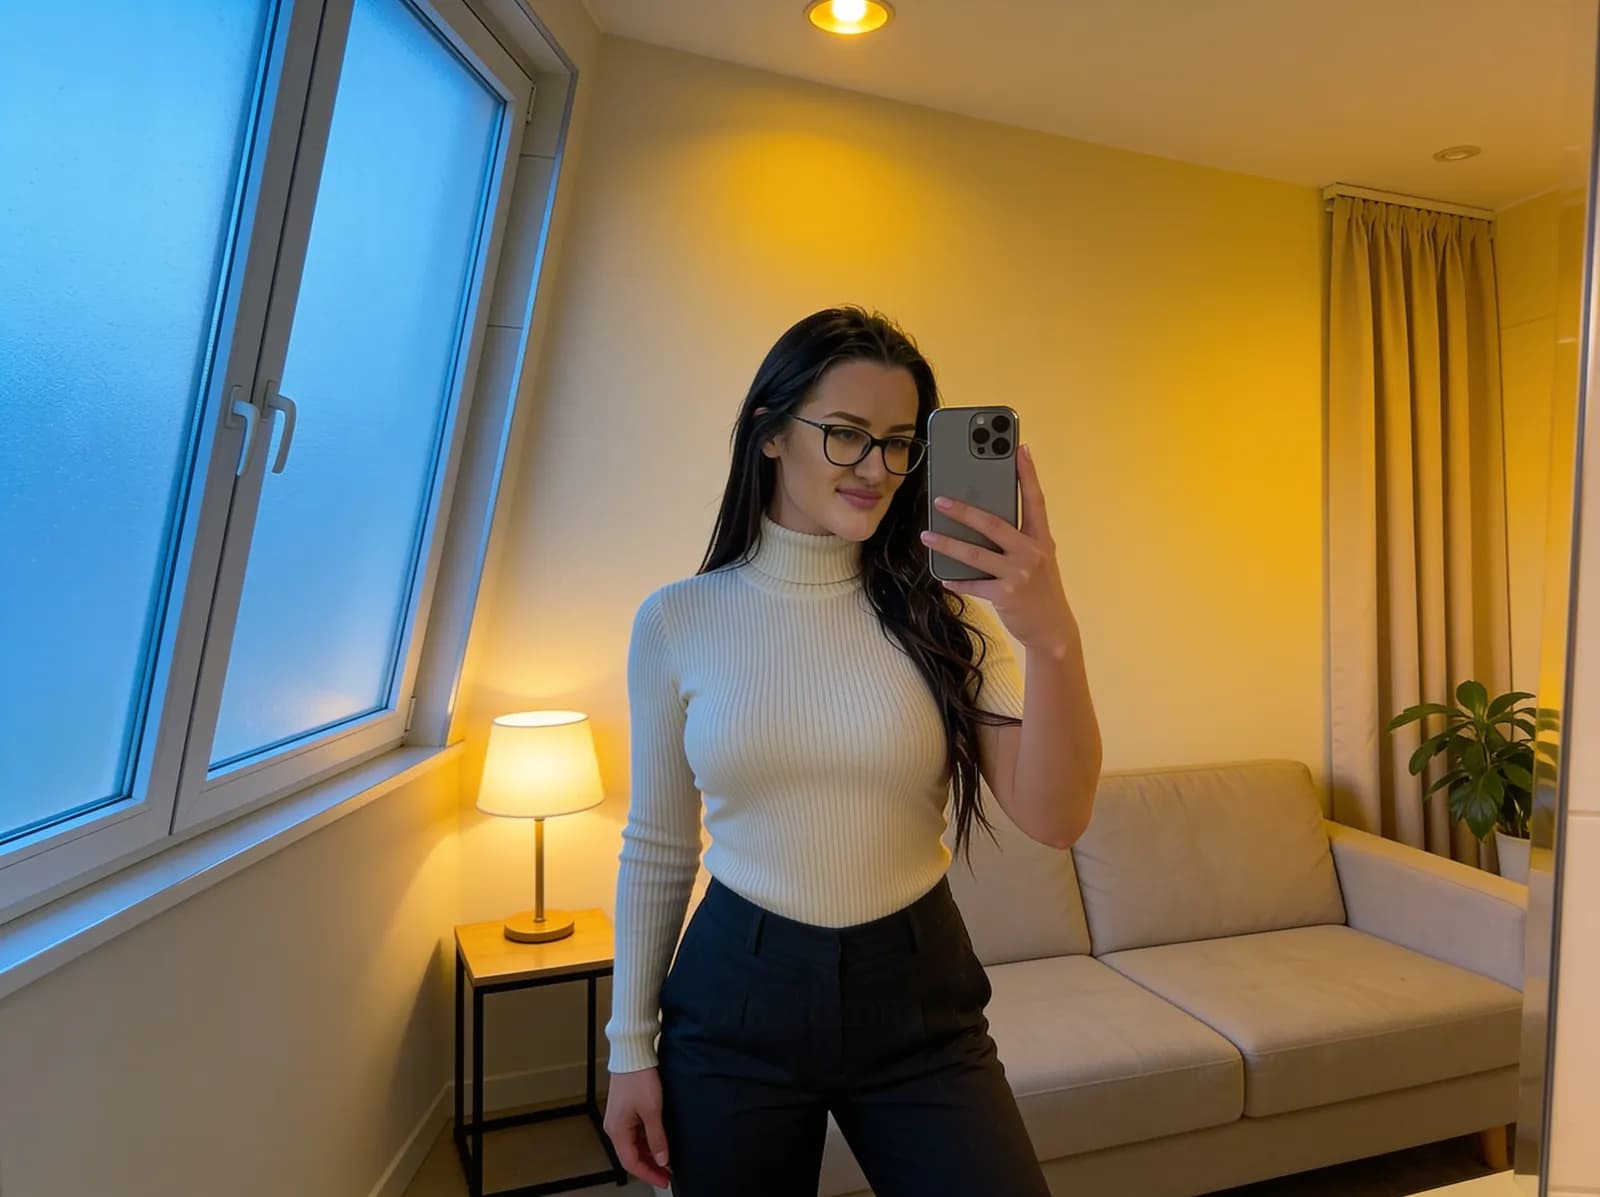
Cool daylight and warm household lights can produce different colors across the same photo.
Best for
Situations where mixed color is intentional
Common problem
Automatic white balance may struggle to keep skin, clothing and walls looking consistent.
Quick fix
Choose one main light source and turn off unnecessary lamps or ceiling lights.
Overhead light only
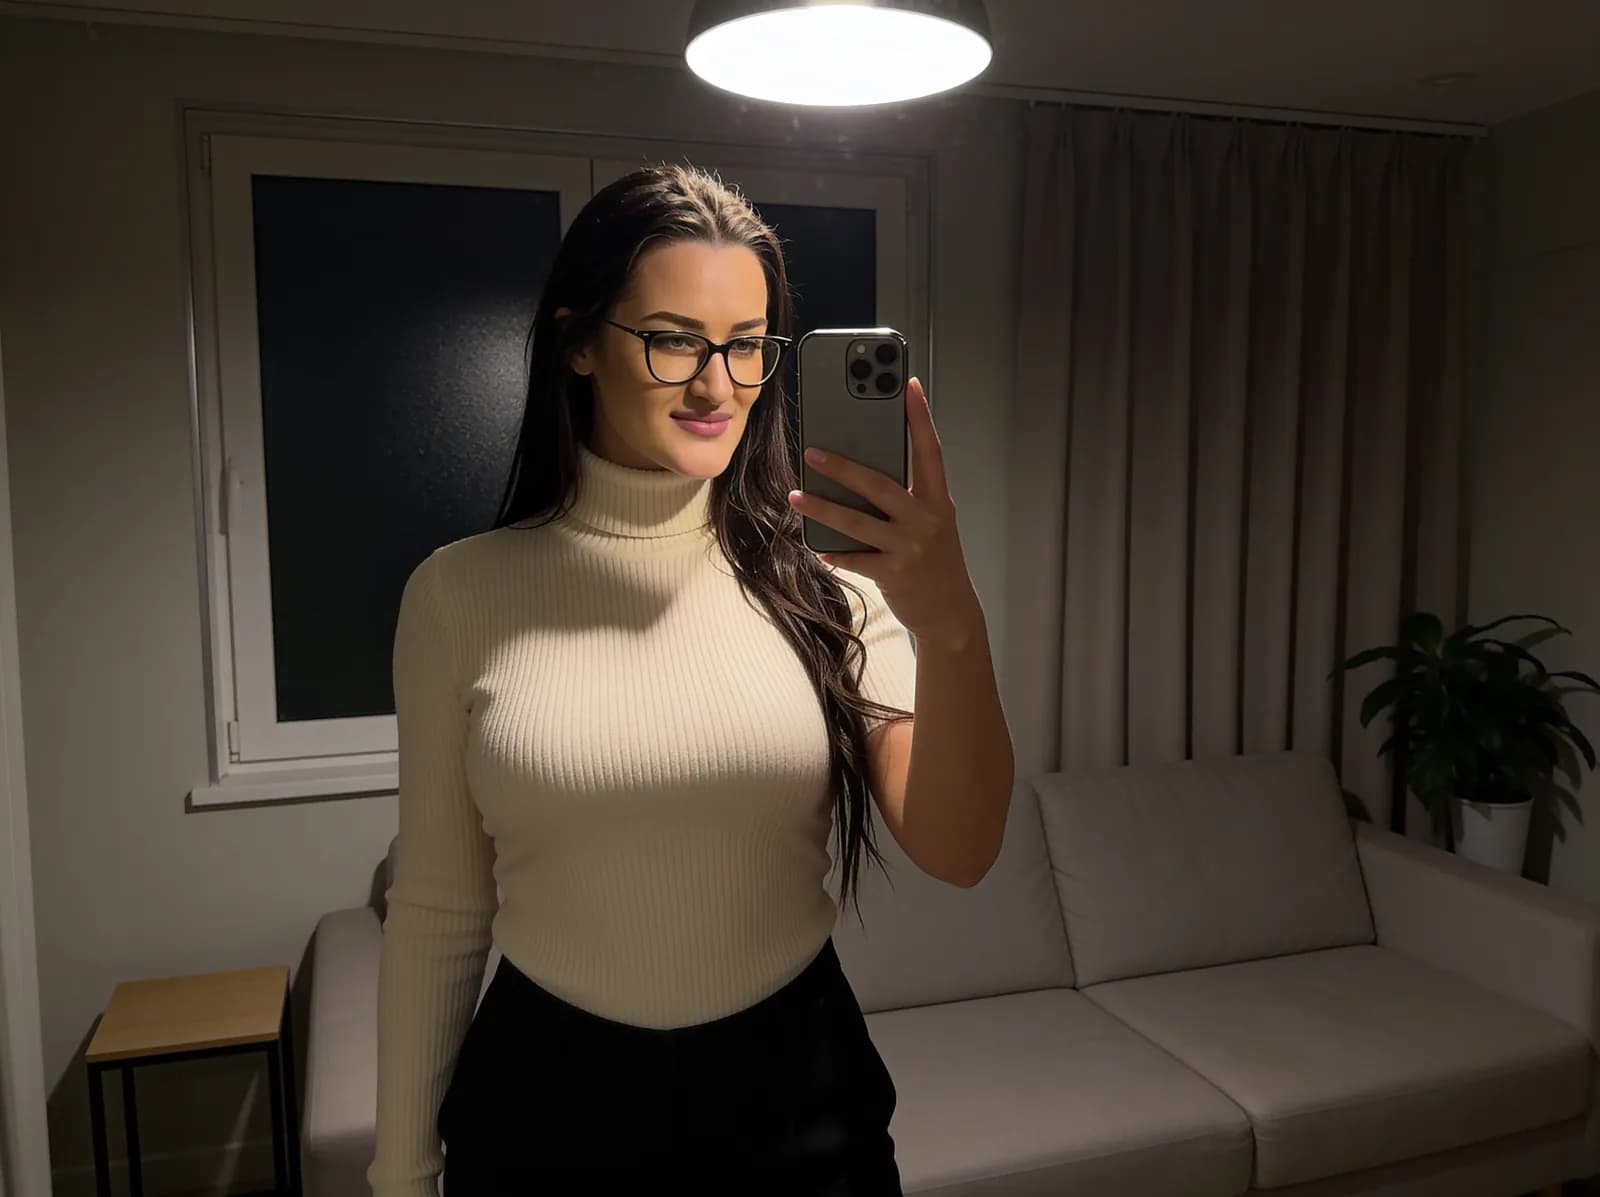
A ceiling light illuminates from above and often creates darker shadows around the eyes, nose and chin.
Best for
Quick photos when no other light is available
Common problem
The top of the face can be bright while the eye area looks comparatively dark.
Quick fix
Move toward softer reflected light or switch to a window or lamp positioned closer to face level.
Too close to the background
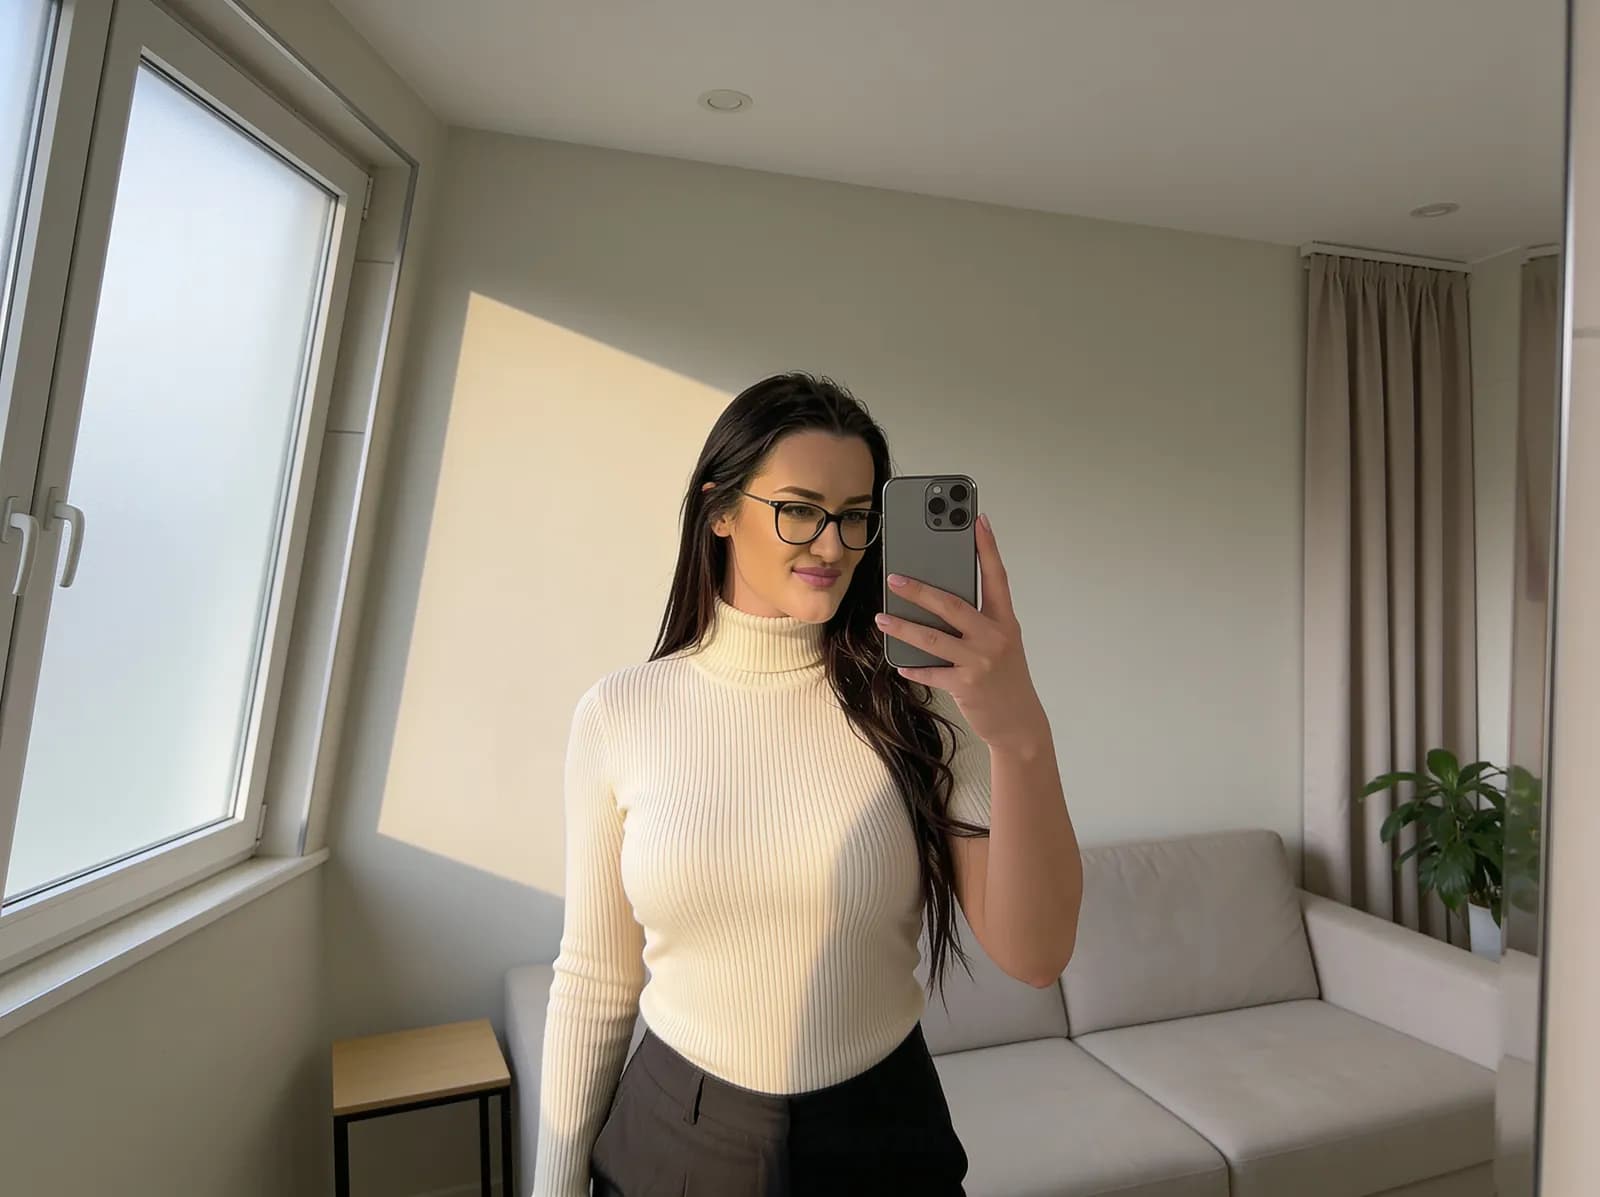
Standing very close to a wall can create stronger shadows and make the photo feel visually flat.
Best for
Only when space is very limited
Common problem
The wall competes with the subject and the background may look crowded or harsh.
Quick fix
Create more distance between the subject and the wall whenever the room allows.
Move away from the background
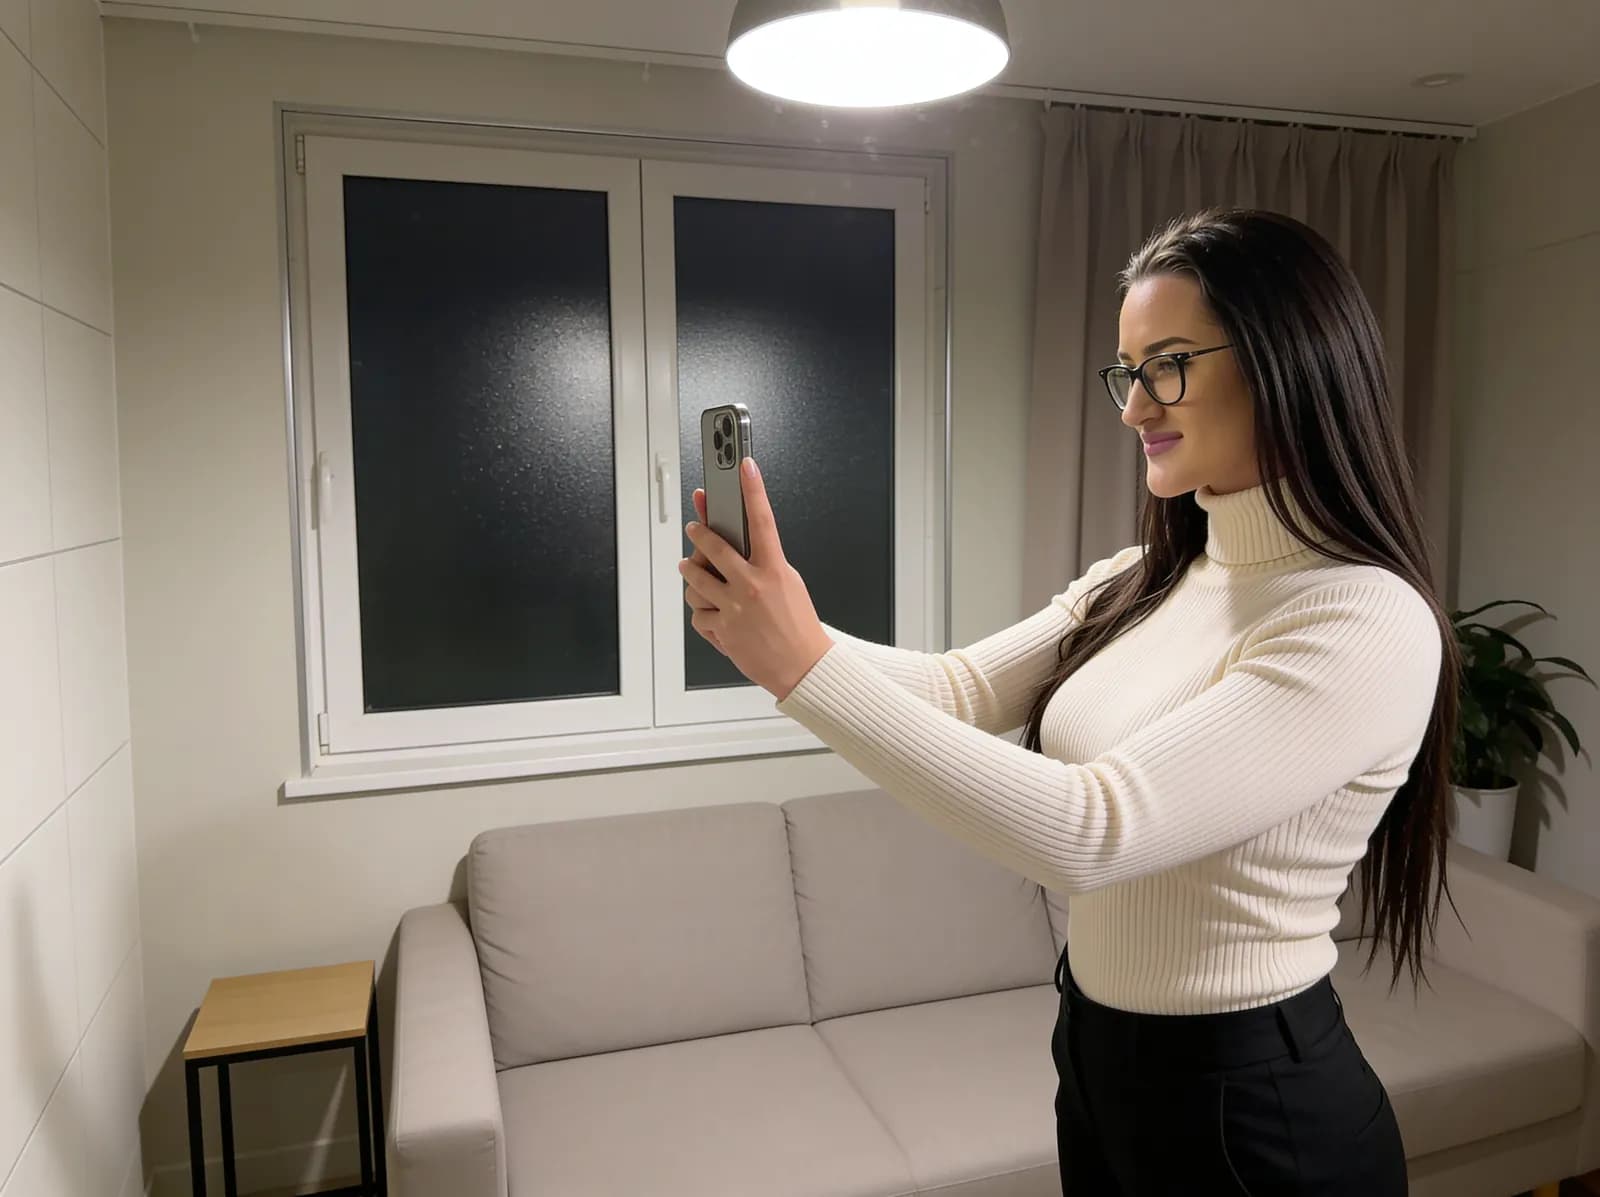
Increasing the distance from the background reduces wall shadows and creates a stronger sense of depth.
Best for
Cleaner indoor portraits
Common problem
In a very small room, you may not have enough space to create separation.
Quick fix
Even moving half a meter forward can improve the relationship between the subject and background.
Use the regular 1x camera
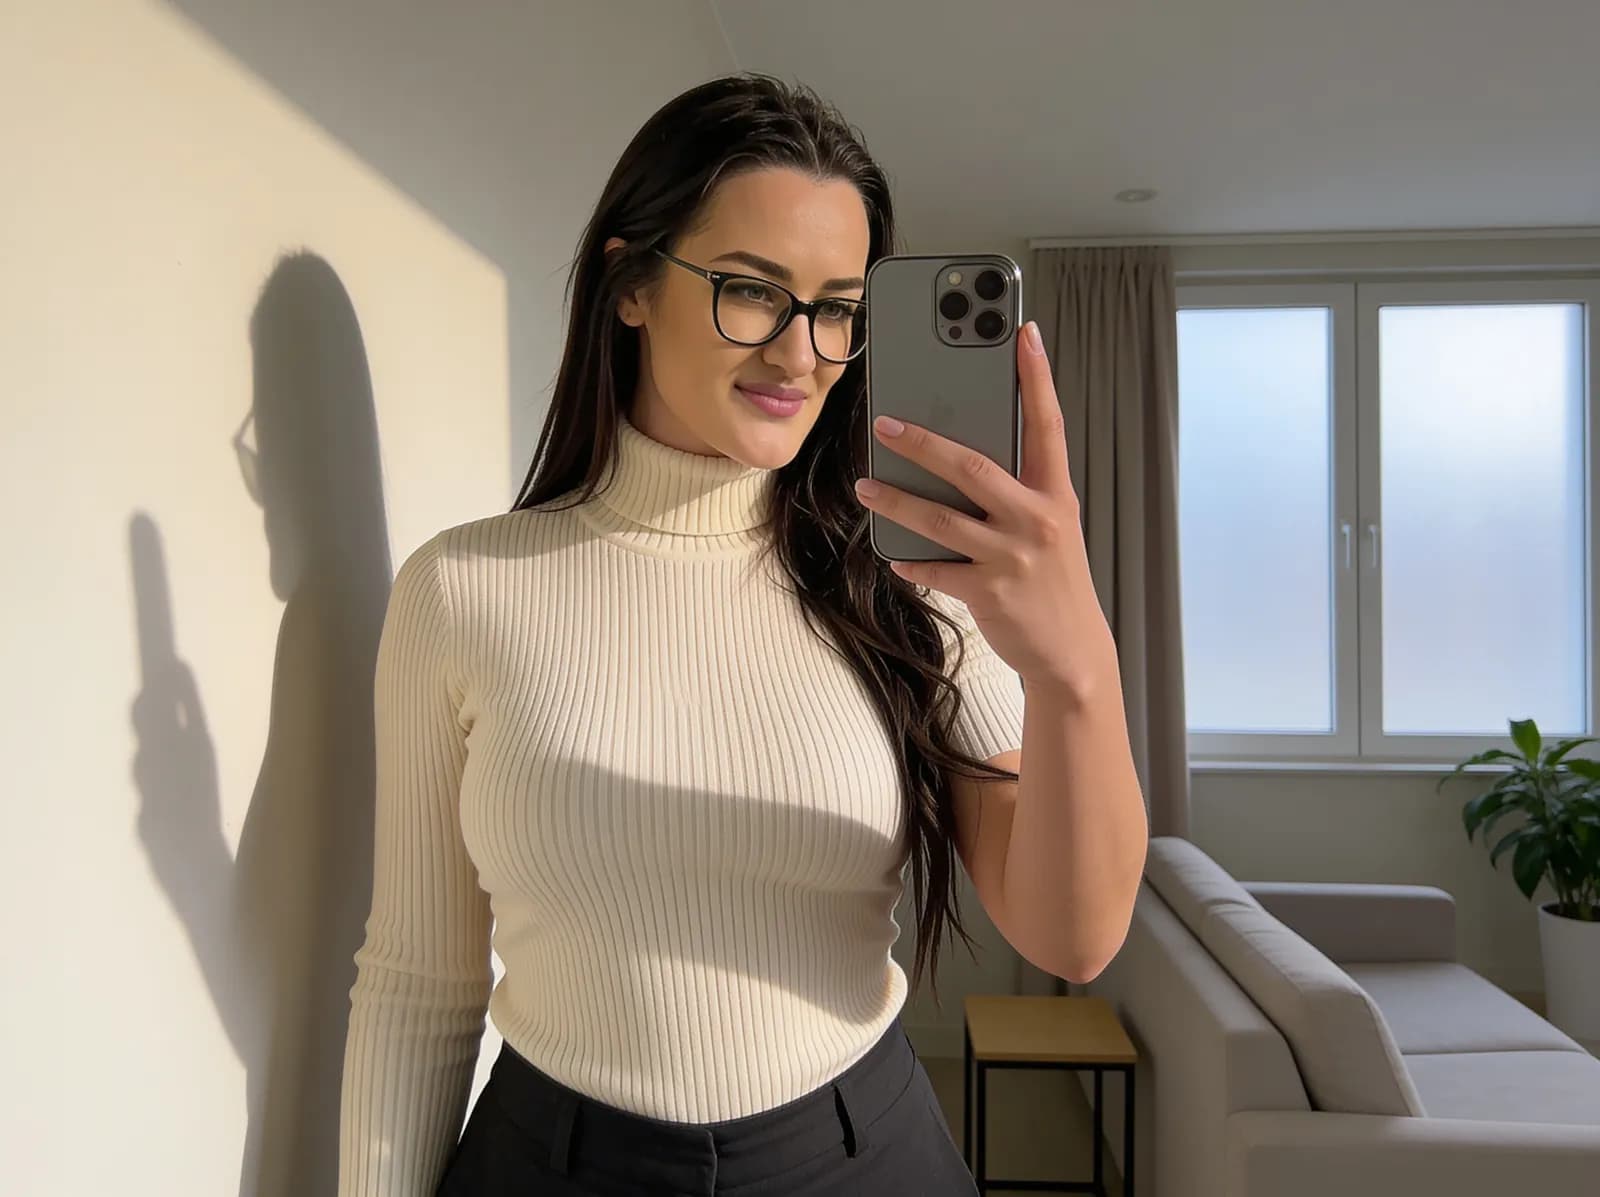
Using the regular 1x camera and physically changing your position usually preserves more detail than relying on heavy digital zoom.
Best for
Most everyday indoor photos
Common problem
Standing in one place and zooming heavily can reduce detail and make the image look softer.
Quick fix
Move the photographer or subject when possible instead of using large amounts of digital zoom.
Low-light indoor photo
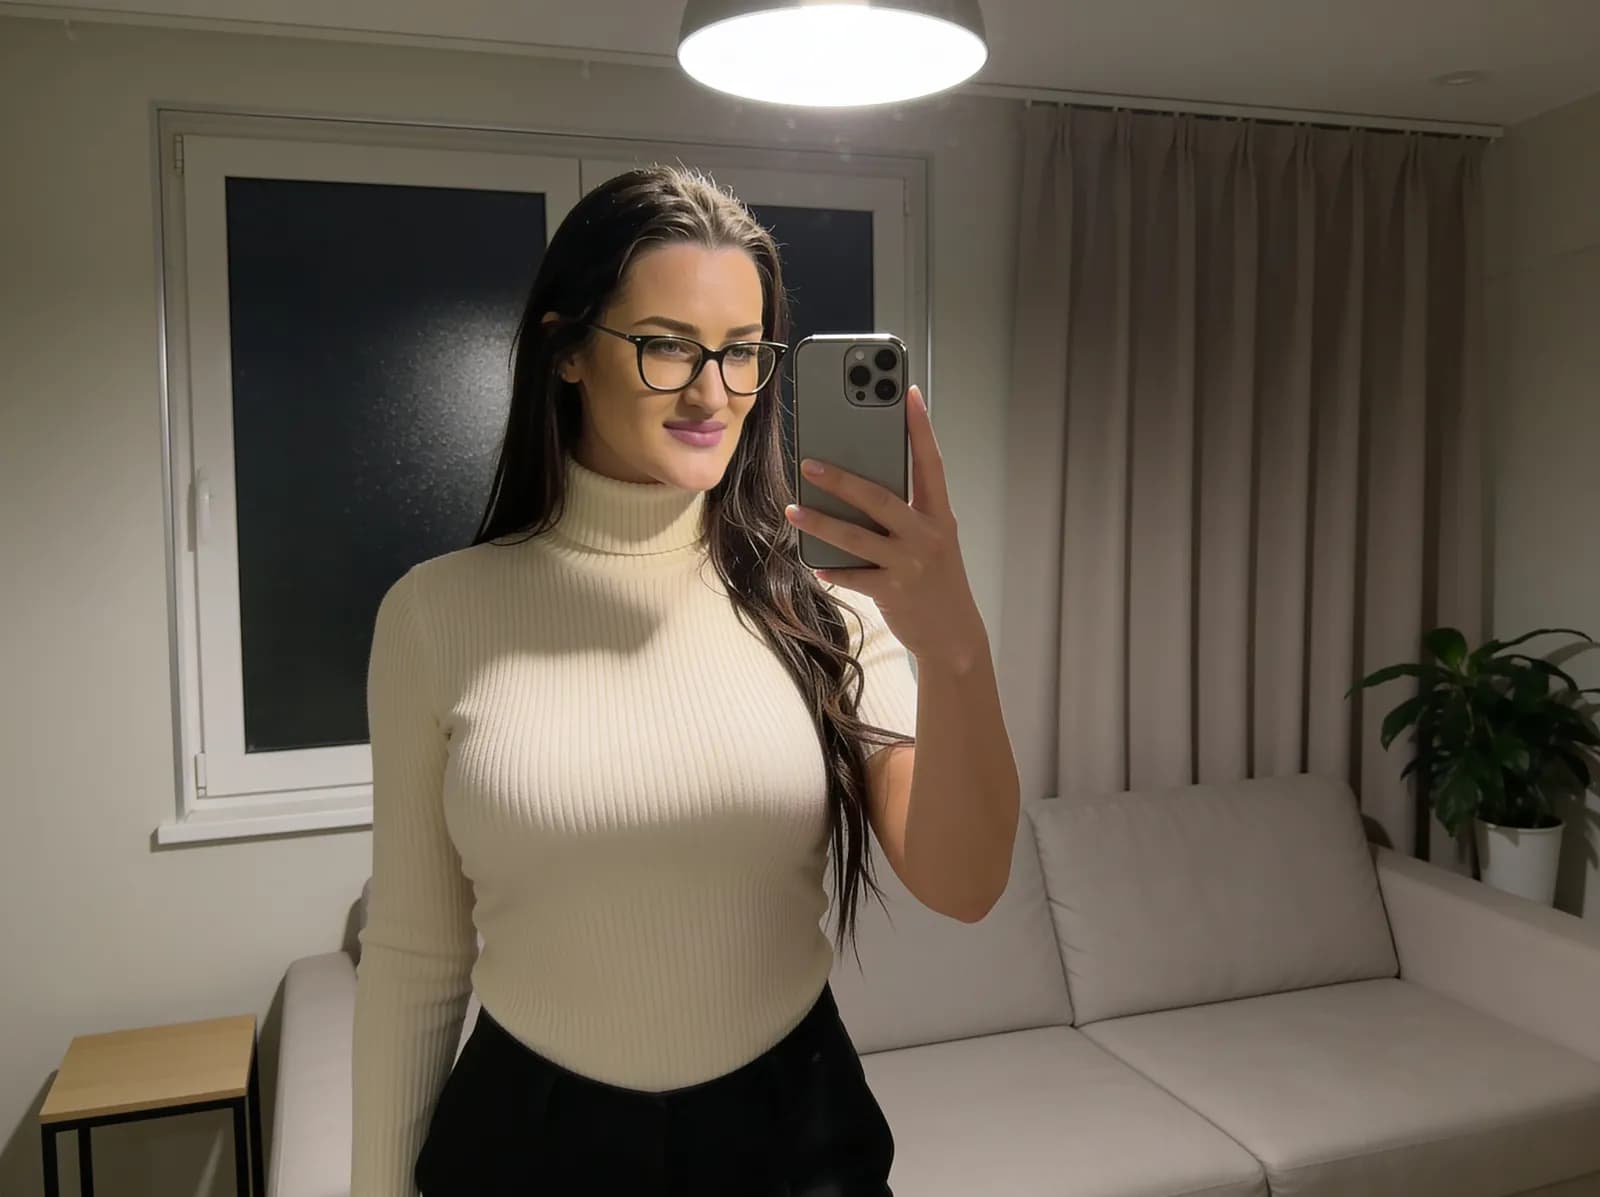
When the room is dark, the phone has less light to work with and may use slower exposure, stronger processing or higher sensitivity.
Best for
Evening photos when brighter light is unavailable
Common problem
Noise, softer detail and motion blur become more likely.
Quick fix
Use the brightest practical lamp, keep the phone steady and avoid unnecessary movement while the photo is captured.
How far should you stand from the background?
There is no single perfect distance because room size, lens choice and composition all matter. The useful principle is separation: if you are pressed directly against a wall, shadows and background texture become more noticeable.
If the room allows it, move forward and compare the result. Even a modest increase in distance can soften wall shadows and make the scene feel less flat.
1x camera vs digital zoom
For most everyday indoor photos, the regular rear camera is a good place to start. If you need a tighter composition, first try moving closer rather than immediately using large amounts of digital zoom.
Some phones have additional optical or high-quality crop options, so the exact result depends on the device. The main idea is to avoid unnecessary zoom when changing your physical position can produce the framing you want.
How to handle indoor exposure
Tap the subject on the camera preview before taking the photo. On many phones, you can then adjust exposure slightly brighter or darker.
Avoid increasing brightness until every shadow disappears. Indoor photos often look more natural when some shadow remains, especially when the main light comes from one side.
Check the highlights first
If a pale wall, bright window or light-colored shirt has become a flat white area with no visible detail, reduce the exposure slightly before taking the photo.
Why low light changes smartphone photos
In darker rooms, the camera has less light available. The phone may compensate by using a longer exposure, stronger processing or higher sensitivity.
That can lead to more visible noise, softer fine detail and motion blur. Keeping both the subject and phone relatively still can make a noticeable difference.
6 common indoor phone photography mistakes
1. Mixing every available light
More light is not always better. Warm bulbs and cool daylight can create inconsistent color across the same scene.
2. Standing directly against a wall
This can create strong shadows and reduce the feeling of depth in the image.
3. Using only a ceiling light
Overhead lighting often creates less flattering downward shadows than a window or lower-positioned lamp.
4. Overusing digital zoom
If you can physically change your position, that is often a better first option for adjusting composition.
5. Making every photo too bright
Brightening until all shadows disappear can remove natural depth and destroy highlight detail.
6. Ignoring the background edges
Lamps, cables, clothing and small household objects near the frame edges can become unexpectedly distracting.
30-second checklist
Before taking an indoor photo
✓ Find the largest useful window.
✓ Turn off unnecessary lights.
✓ Start with the subject slightly to the side of the window.
✓ Create distance from the background when possible.
✓ Use the regular camera before relying on heavy zoom.
✓ Tap the subject and check exposure.
✓ Keep the phone steadier in low light.
✓ Check the frame edges before taking the final photo.
The easiest indoor setup to repeat
If you want one dependable starting point, use soft window light from the front-side, turn off unnecessary indoor bulbs, move away from the background and shoot with the regular camera at a useful physical distance.
Once that looks good, change one variable at a time. Move the light, change the background distance or test a darker room separately. That makes it much easier to understand what actually improved the photo.
About the visual examples
Sofia is a fictional virtual creator. The images in this guide are digitally created illustrative examples designed to demonstrate changes in lighting, background distance and camera use. They are not documentary photographs of a real photography experiment.