Smartphone Photography
Mirror Selfie Lighting Tips: 7 Lighting Setups Compared
The same mirror selfie can look completely different when the direction, softness or color of the light changes. This guide uses seven controlled visual examples to show what each setup does, what usually goes wrong, and how to improve the result without buying photography equipment.
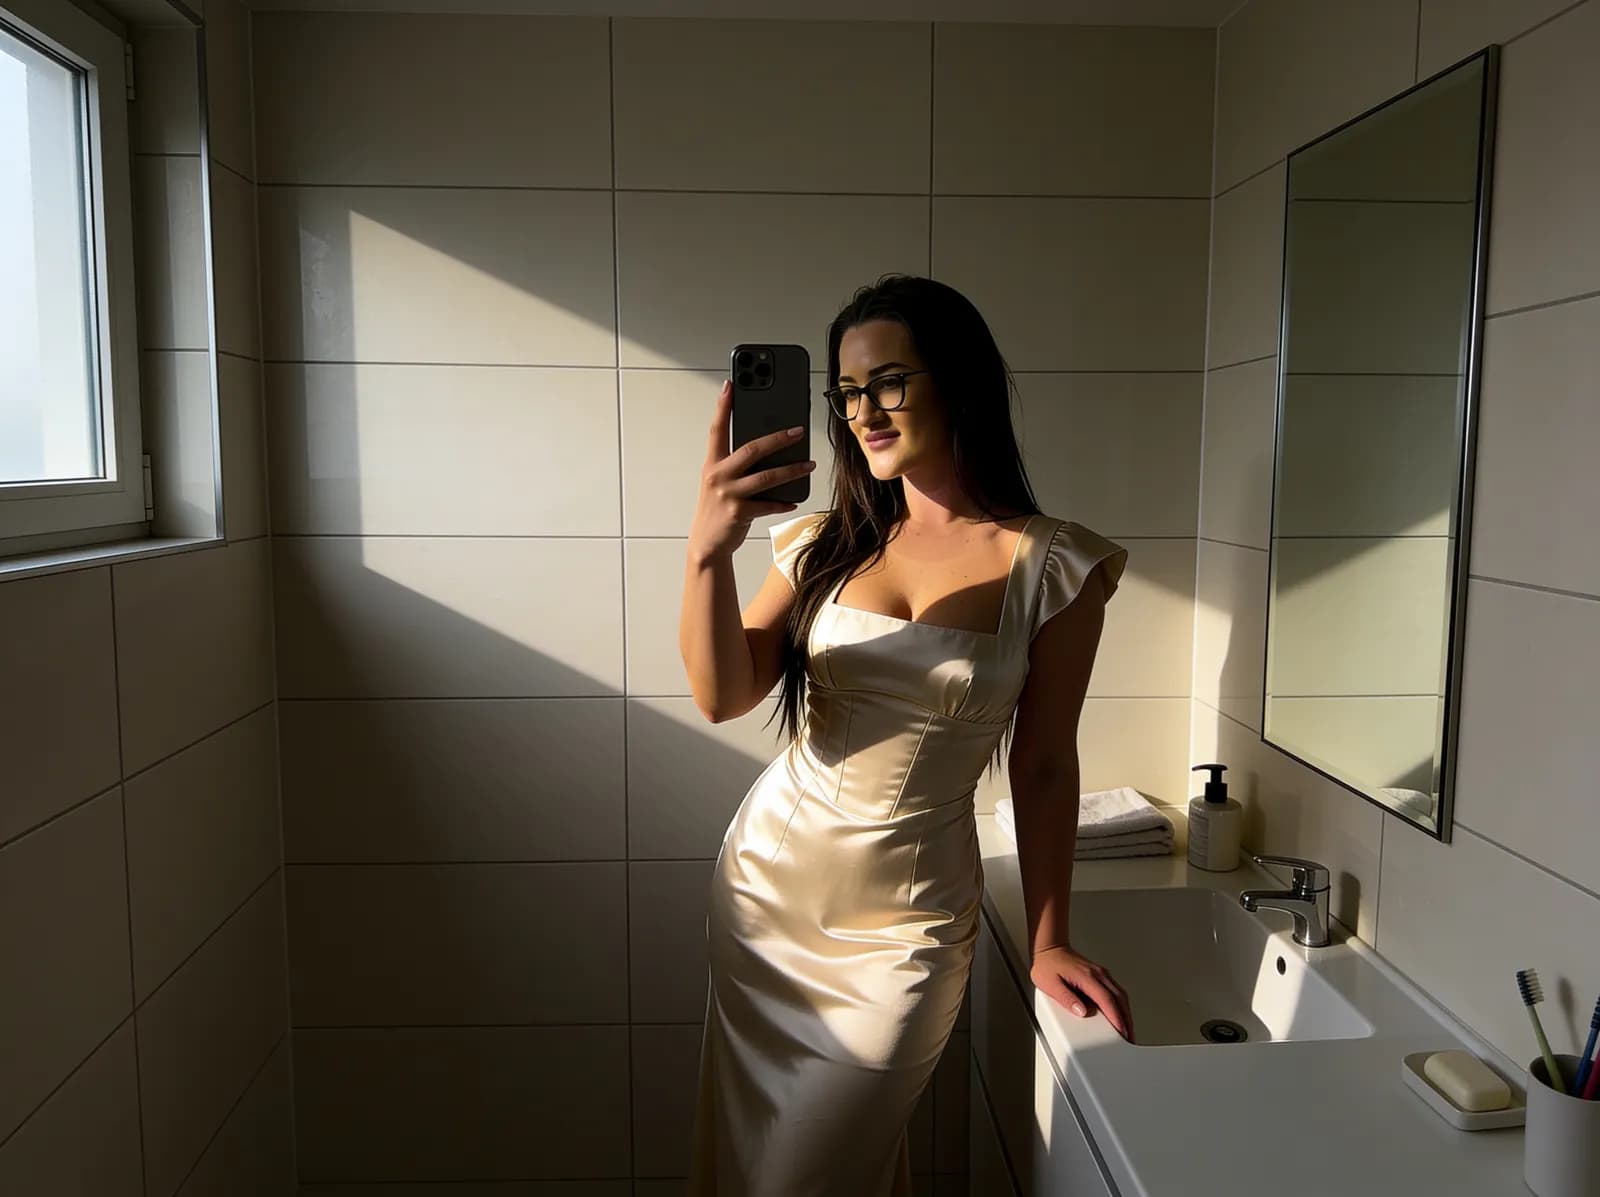
Quick answer
Start with soft window light slightly to one side.
For a natural mirror selfie, turn off unnecessary room lights and position yourself where soft daylight reaches you from the front-side rather than directly from behind. This creates enough shadow to give the face and clothing shape without making the image look harsh.
If the brightest part of the image looks washed out, reduce the phone exposure slightly before taking the photo.
Side-by-side summary
Which lighting setup works best?
| Setup | Look | Difficulty | Best use |
|---|---|---|---|
| Soft side window | Natural + dimensional | Easy | Best overall starting point |
| Front window | Bright + even | Easy | Clean outfit photos |
| Strong side window | High contrast | Medium | More dramatic images |
| Backlit window | Bright background | Hard | Intentional backlight |
| Overhead light | Top-heavy shadows | Medium | Last-resort indoor light |
| Vanity light | Warm + even | Easy | Evening selfies |
| Mixed light | Uneven color | Hard | Creative use only |
The comparison
Seven lighting setups explained
The subject, outfit, framing and room remain intentionally similar across the examples. The main variable is the lighting direction and color, making it easier to compare the effect of each setup.
Soft side-window light
Soft daylight coming from one side gives the face and clothing gentle shape without creating very hard shadows.
Best for
Natural everyday mirror selfies
Common problem
If the window is much brighter than the room, the phone may darken the subject to protect the highlights.
Quick fix
Move slightly farther from the window or lower the exposure until bright areas keep their detail.
Front window light
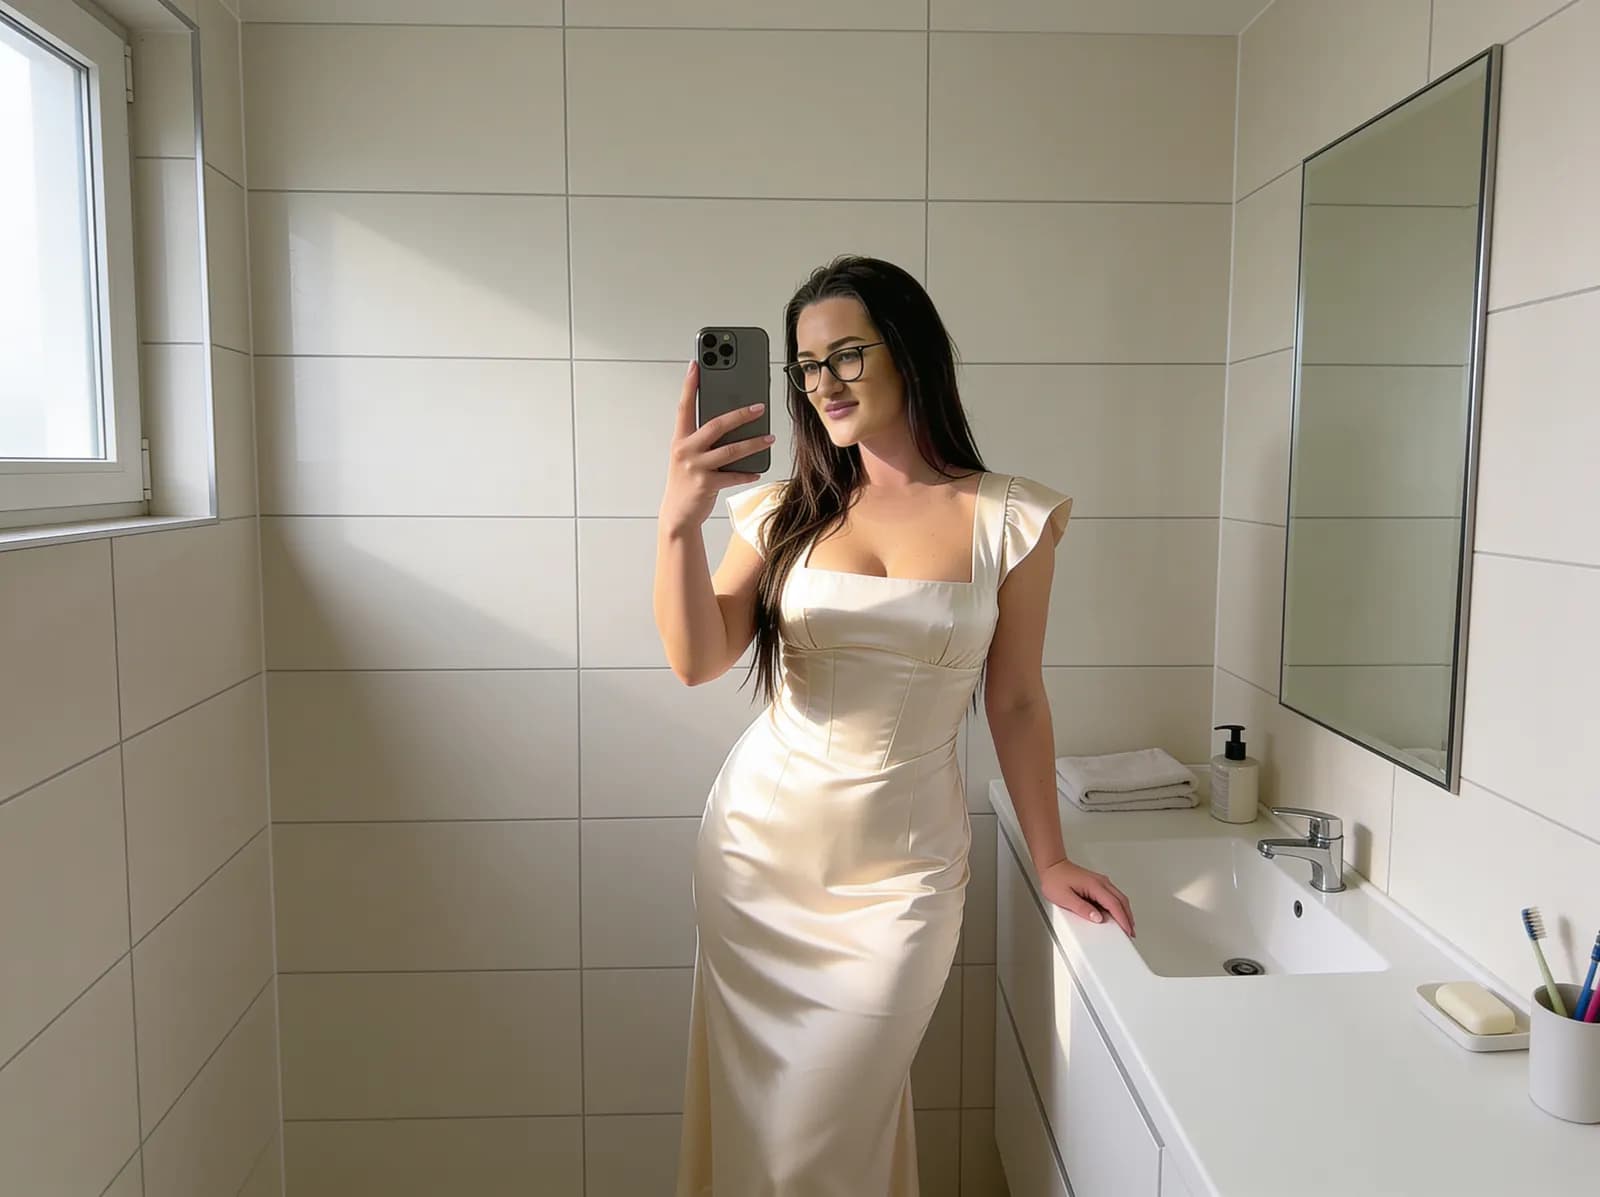
When soft daylight reaches you from roughly the same direction as the mirror, shadows become lighter and the face is illuminated more evenly.
Best for
Bright, simple outfit photos
Common problem
Very even front light can make the image look flatter because there is less shadow defining the face and clothing.
Quick fix
Turn slightly away from the light or move a little to one side to bring back some natural shape.
Strong side-window light
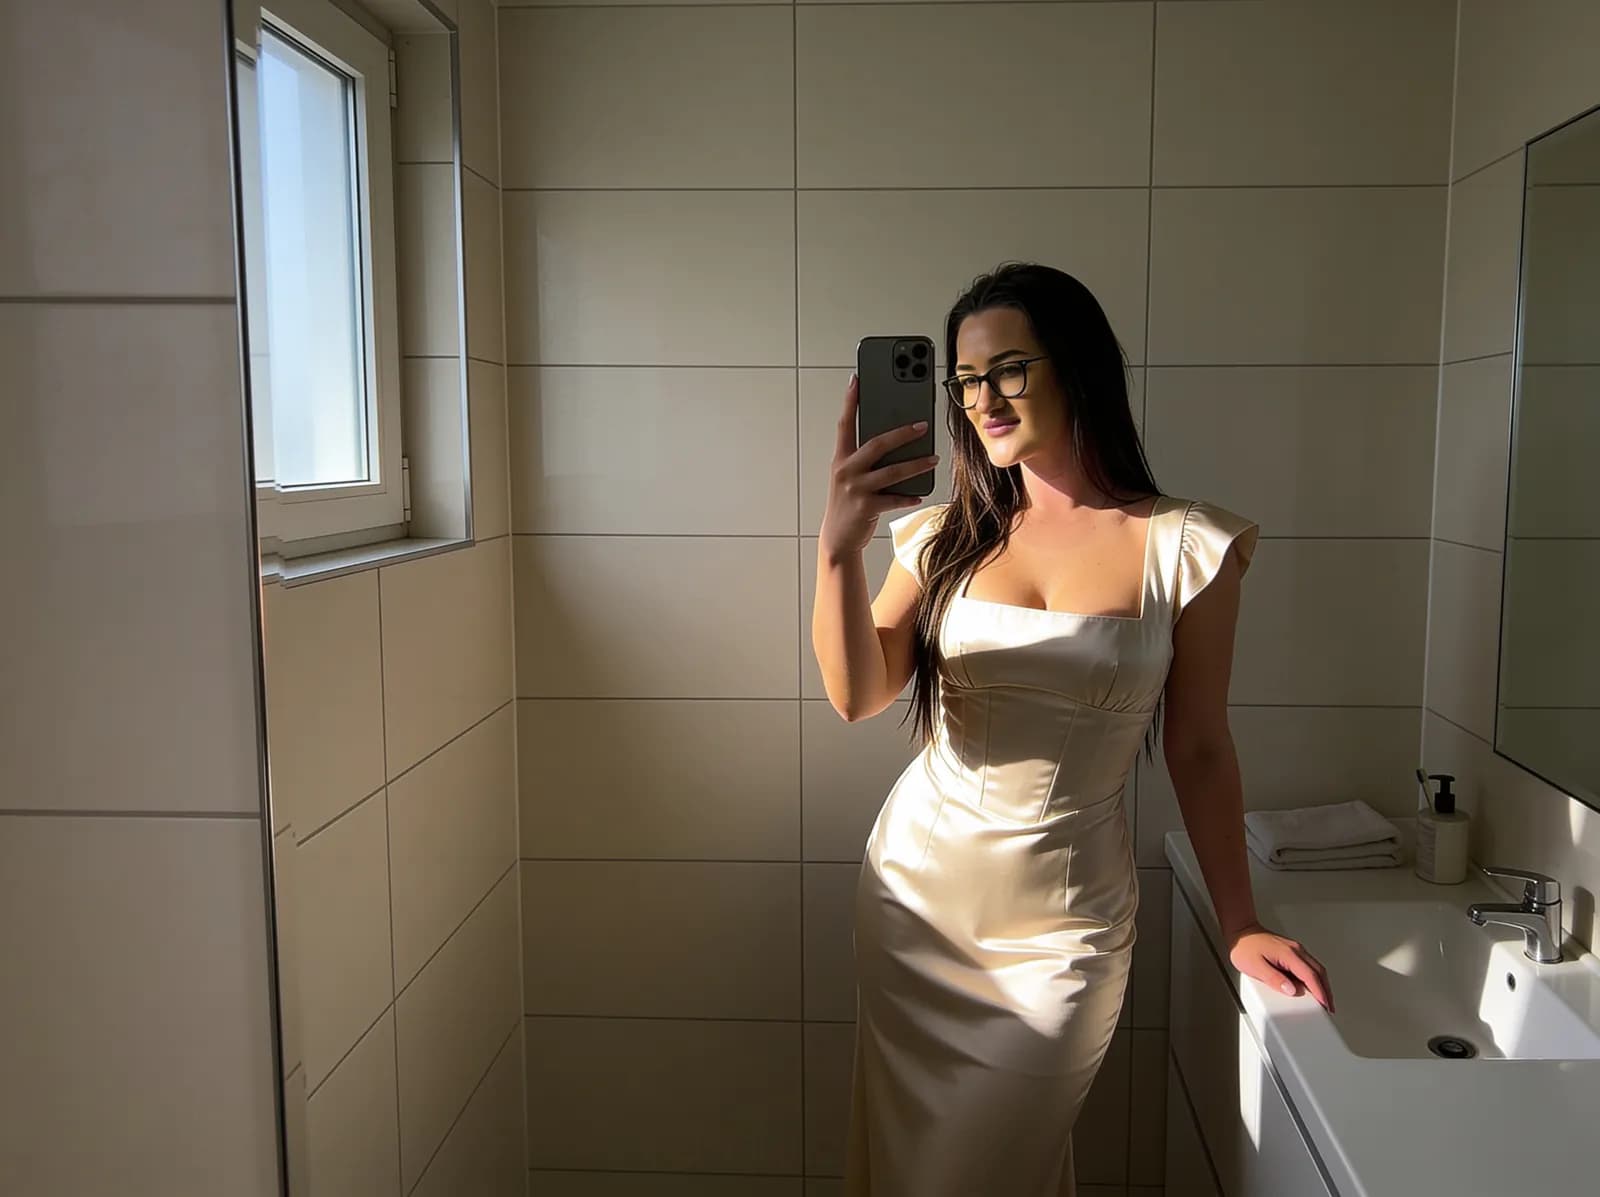
Stronger directional daylight creates a clearly brighter side and a darker side, which can add depth and stronger fabric texture.
Best for
More dramatic photos
Common problem
Very strong light can create blown highlights while the shadow side becomes too dark.
Quick fix
Use a sheer curtain, step farther into the room, or change your angle until the transition between light and shadow is softer.
Backlit window
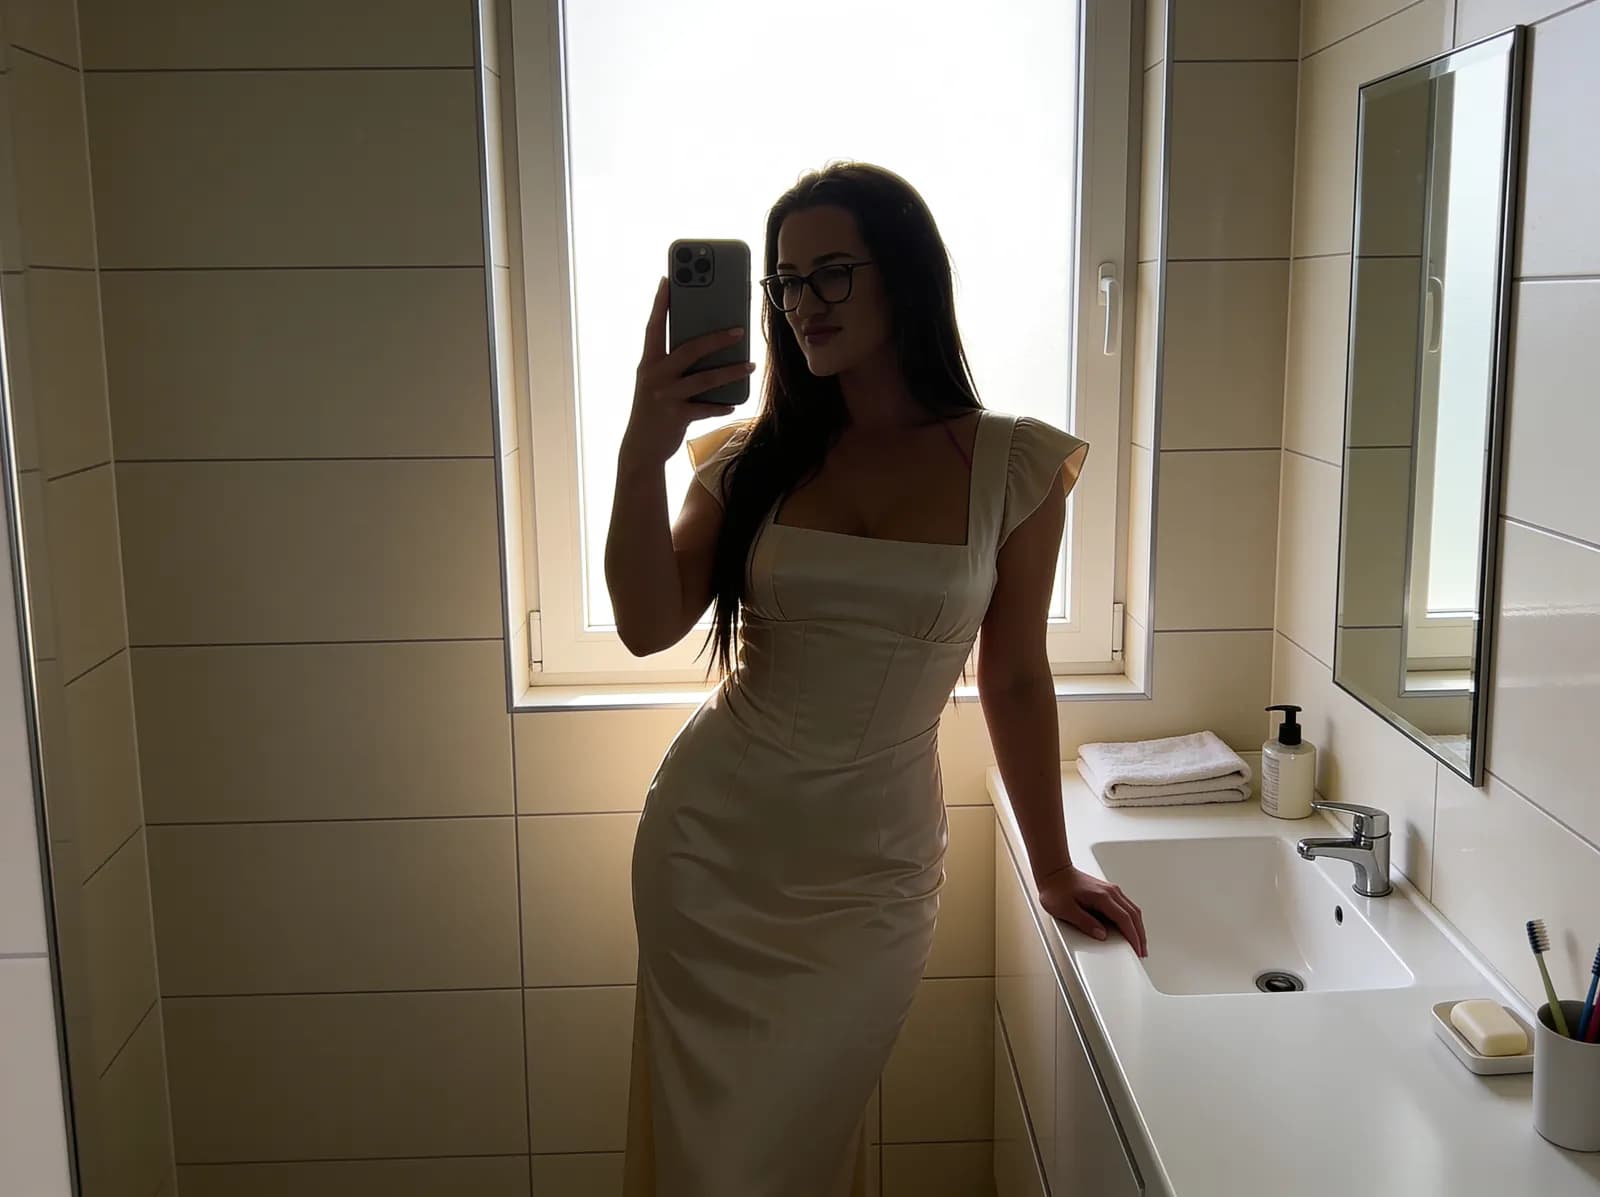
A bright window behind you creates a large difference between the background brightness and the light reaching your face.
Best for
Intentional silhouettes or bright atmospheric backgrounds
Common problem
The phone may expose for the window, leaving the face and outfit too dark.
Quick fix
Move so the window is beside you instead, or raise exposure carefully while checking that the background is not completely blown out.
Overhead light only
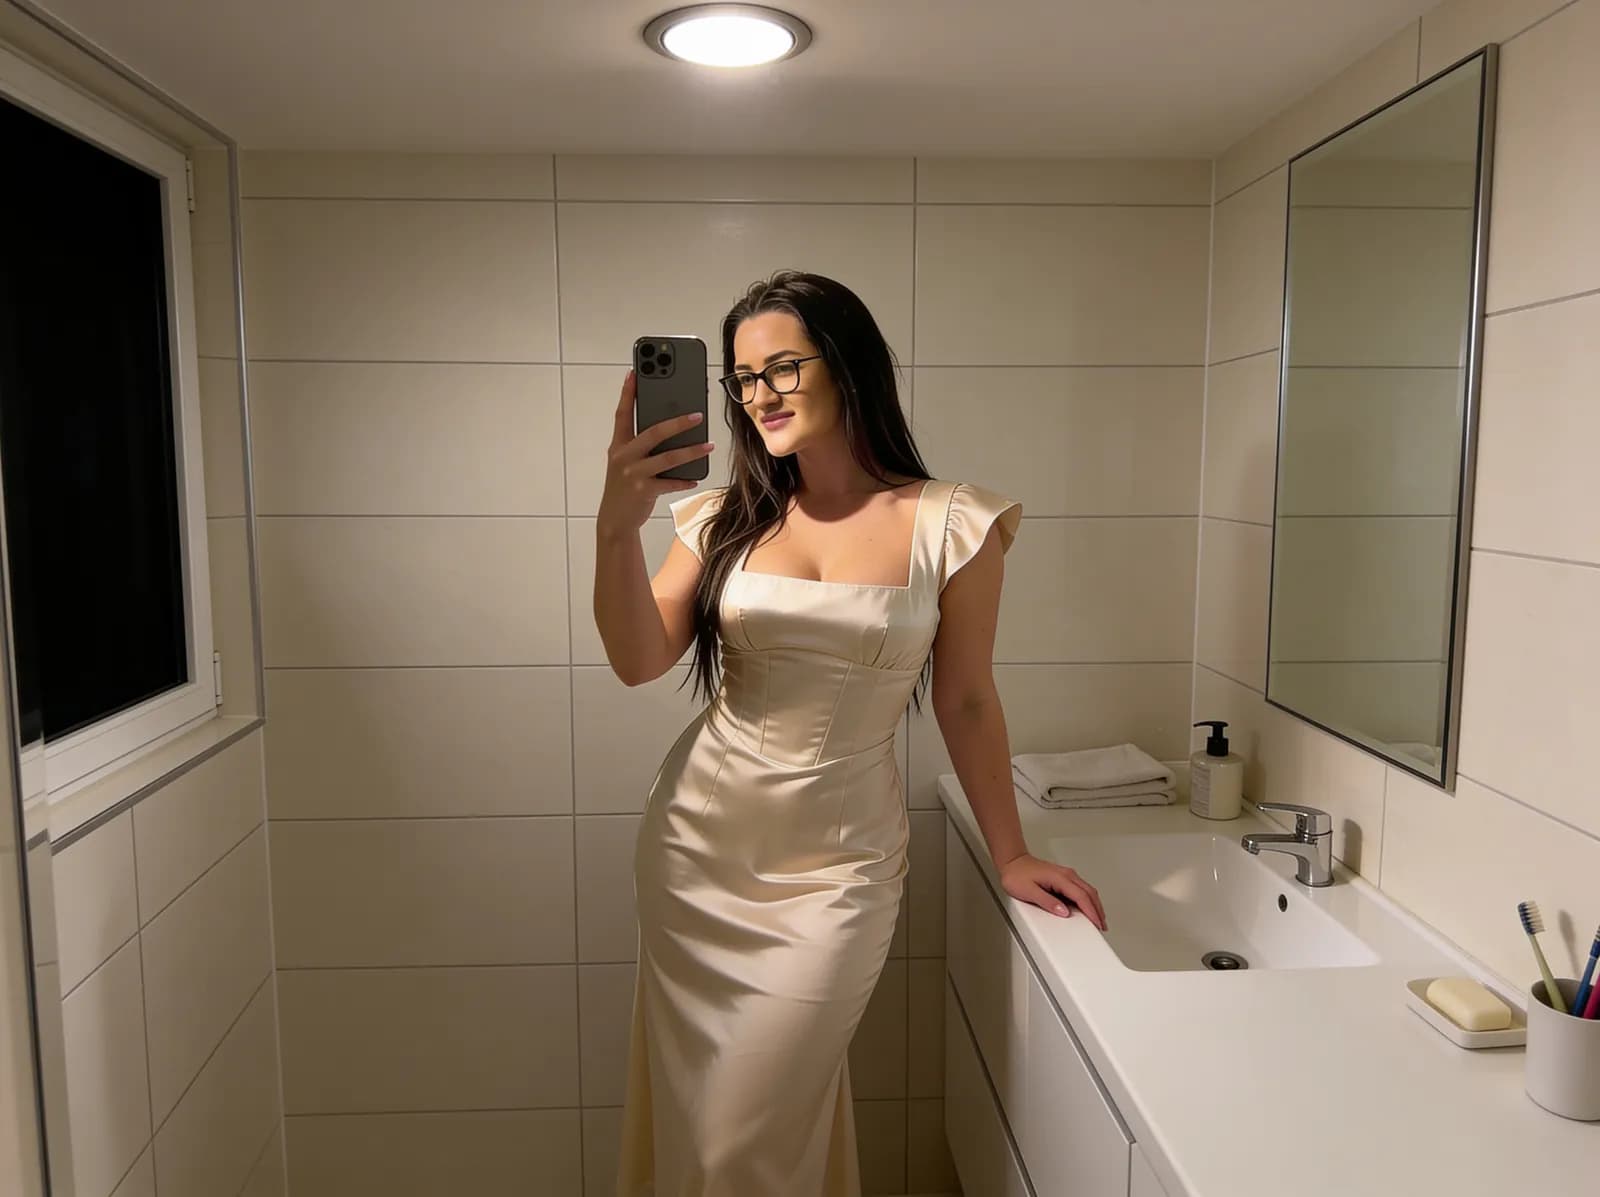
A ceiling light illuminates from above, which often creates stronger downward shadows under the eyes, glasses, nose and chin.
Best for
Quick photos when no other light is available
Common problem
The top of the face may be bright while the eye area becomes darker.
Quick fix
If possible, use vanity lighting instead or move toward a softer reflected light source.
Vanity light only
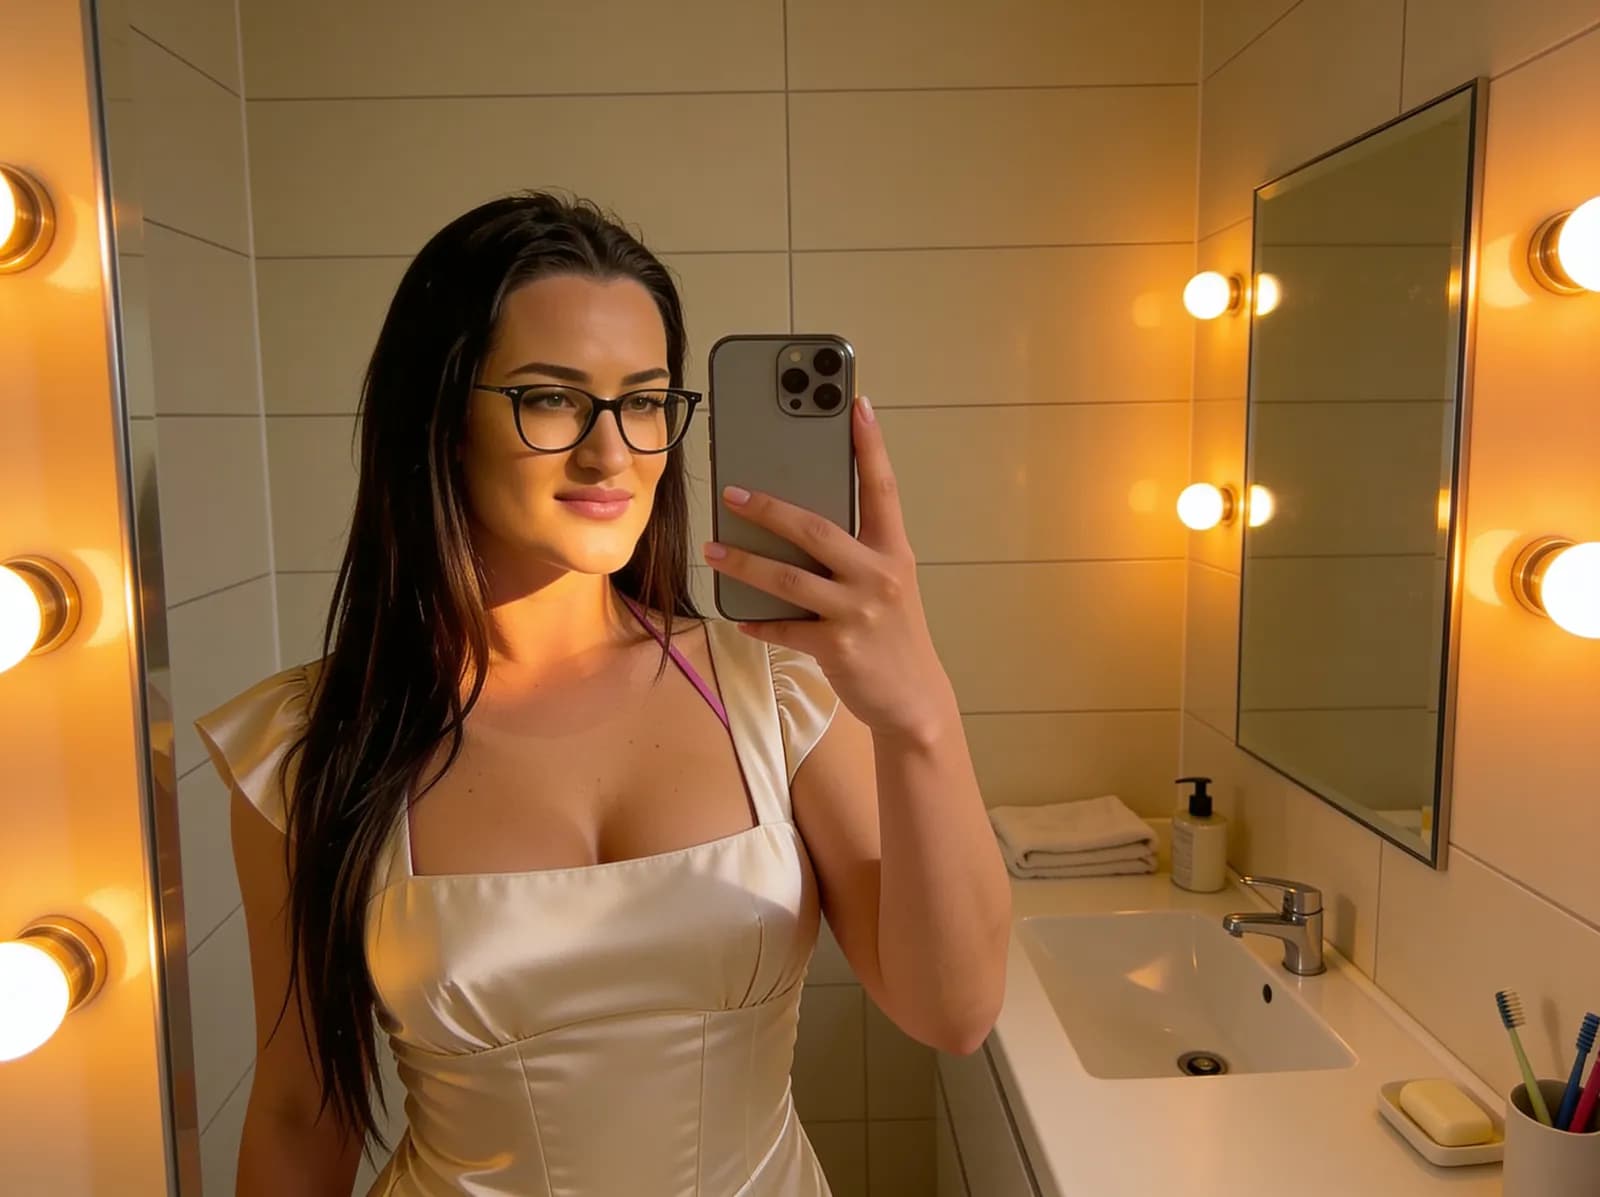
Lights positioned beside or around the mirror illuminate the face from a more useful direction than a single ceiling fixture.
Best for
Evening mirror selfies
Common problem
Warm bulbs can make skin, white clothing and neutral walls appear yellow or orange.
Quick fix
Avoid mixing several different light colors and keep the exposure moderate so the highlights stay controlled.
Mixed daylight and warm light
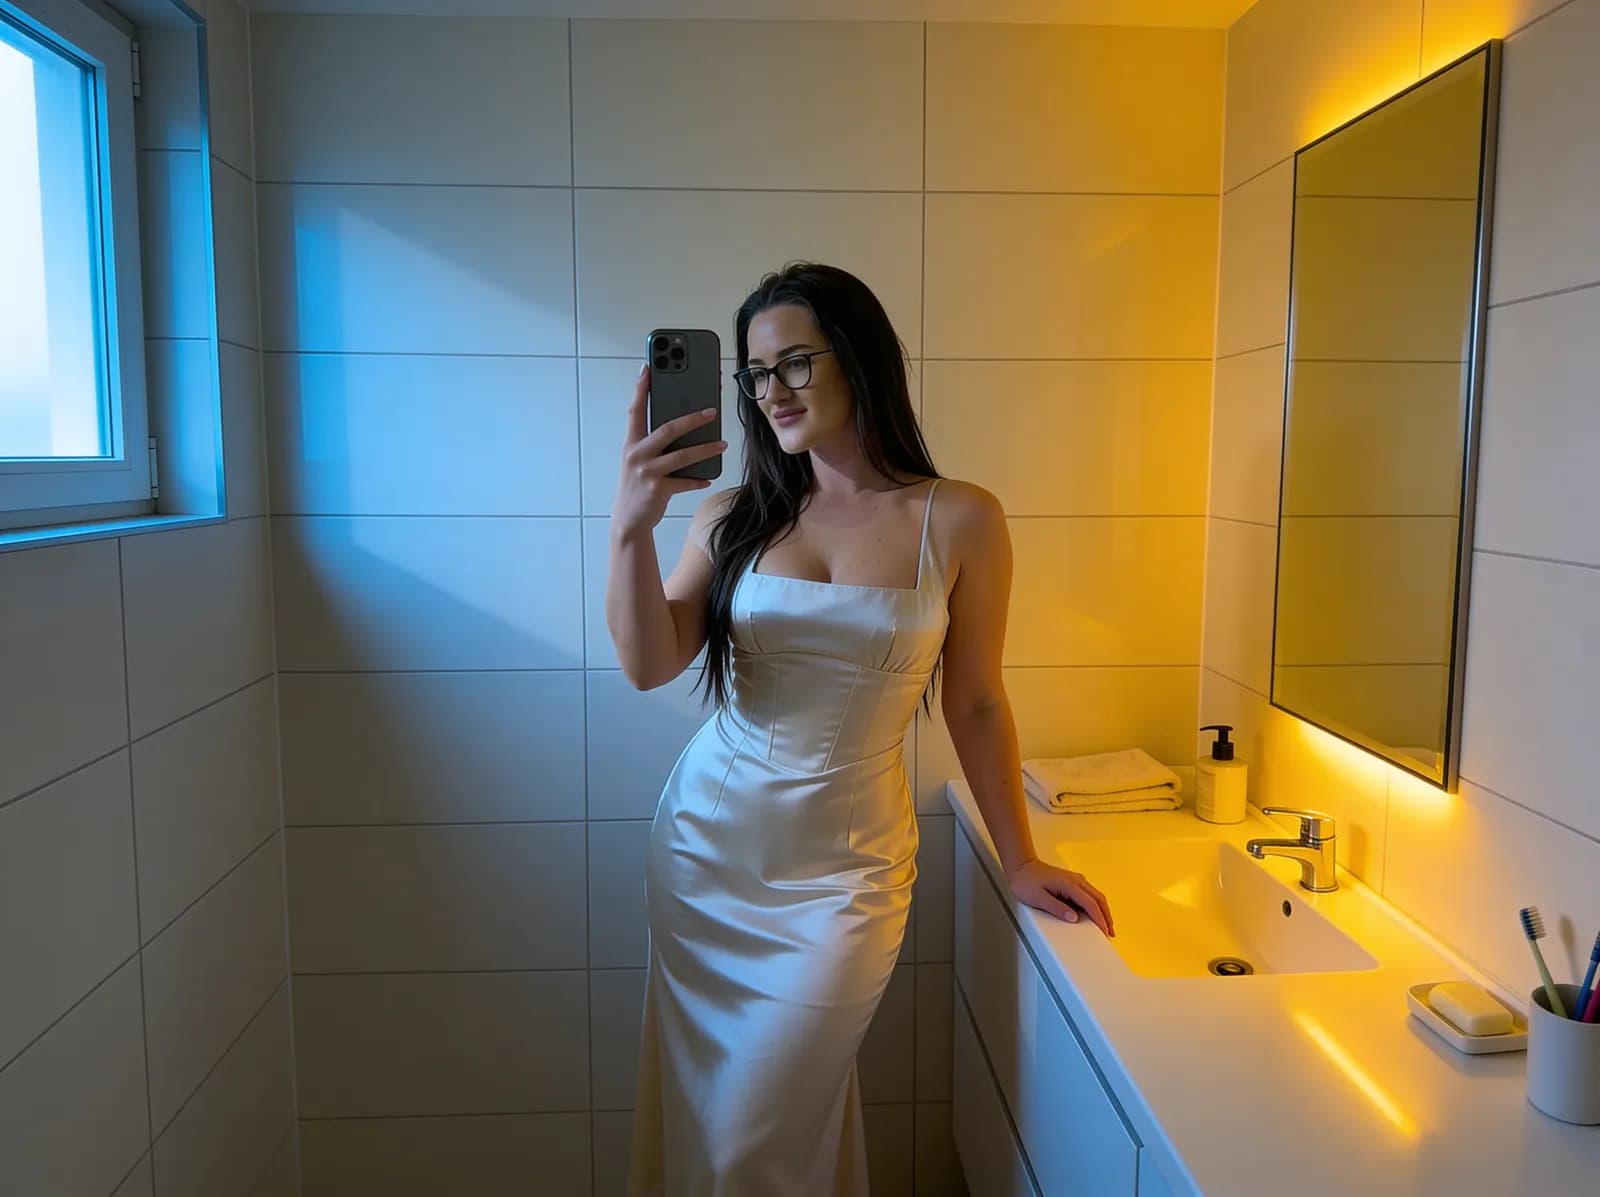
Cool daylight and warm household bulbs can illuminate different parts of the same scene with noticeably different colors.
Best for
Situations where mixed color is intentional
Common problem
Automatic white balance may struggle to make the face, dress and room all look natural at the same time.
Quick fix
Choose one main light source. Often, simply turning off unnecessary lamps produces a cleaner result.
How to adjust exposure on your phone
Before taking the photo, tap the part of the image you want the camera to prioritize. On many phones you can then drag the exposure control slightly brighter or darker.
Avoid automatically making every photo brighter. If a white wall, window or light-colored dress is already close to pure white, increasing exposure can remove texture and highlight detail.
Simple exposure check
Look at the brightest meaningful area in the photo. If the fabric, skin or wall has become a flat white patch with no visible detail, lower the exposure slightly.
5 common mirror selfie lighting mistakes
1. Standing directly in front of a bright window
A very bright background makes it harder for the phone to keep both the subject and the window properly exposed.
2. Mixing several light colors
Daylight, warm lamps and cool bathroom bulbs can produce inconsistent colors across the same image.
3. Using only a ceiling light
Light coming only from above often creates darker shadows around the eyes and underneath facial features.
4. Standing too close to the mirror
Moving slightly farther back gives you more control over the composition and makes it easier to keep the phone from dominating the frame.
5. Ignoring mirror glare
Small changes to the phone angle can reduce bright reflections from vanity bulbs and windows without requiring any editing.
30-second checklist
Before taking the photo
✓ Clean the mirror.
✓ Turn off unnecessary lights.
✓ Start with soft window light from one side.
✓ Check the brightest highlights before increasing exposure.
✓ Step slightly farther from the mirror.
✓ Check the background edges for distracting objects.
✓ Take several frames before changing the lighting.
The easiest setup to repeat
If you only remember one setup from this guide, use a window as your main source, move slightly to the side rather than standing directly in front of it, and turn off unnecessary indoor lights. That combination is simple, repeatable and works in many ordinary rooms.
Once you understand how that setup looks, experiment with stronger side light, vanity lighting and other positions. Comparing small changes one at a time is more useful than changing the room, clothing, pose and lighting all at once.
About the visual examples
Sofia is a fictional virtual creator. The comparison images in this guide are digitally created illustrative examples. They are designed to demonstrate differences in lighting direction, contrast and color rather than document a real photography test.